These essential cooking techniques are going to be the difference between a meal that’s delicious and one that’s disappointing. In this complete guide, I’ll walk you through the cooking techniques that help freezer meals retain their flavor, texture, and quality.
Cooking Techniques for Freezer Meal Prep (Quick Answer)
Before diving into the details, here’s a quick overview of the cooking techniques that can make the biggest difference in the quality of your freezer meals:
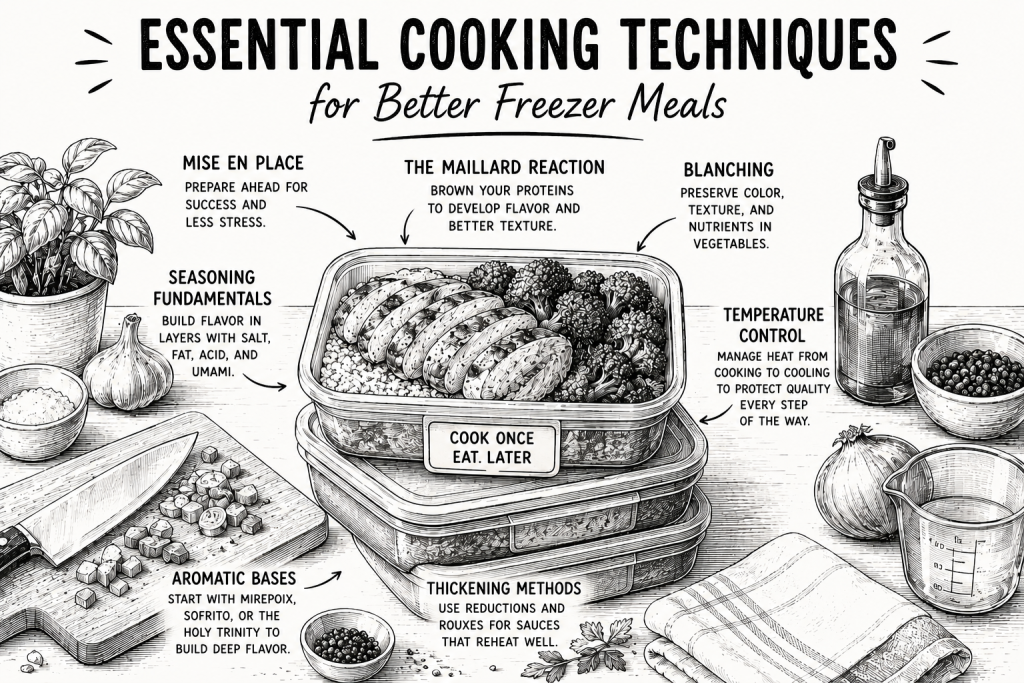
- Mise en Place: Prepare and organize ingredients before cooking to improve efficiency and consistency.
- Seasoning Fundamentals: Build flavor in layers using salt, fat, acidity, and umami.
- The Maillard Reaction: Brown proteins properly to develop deeper flavor and better texture.
- Blanching: Preserve the color, texture, and quality of vegetables before freezing.
- Aromatic Bases: Use foundations like mirepoix, sofrito, or the holy trinity to build flavor from the ground up.
- Thickening Methods: Use reductions and rouxs to create sauces that freeze and reheat well.
- Temperature Control: Manage heat throughout cooking, cooling, and freezing to protect texture and prevent excess moisture.
Disclosure: This article may contain affiliate links. As an Amazon Associate, I earn from qualifying purchases at no extra cost to you.
Why Cooking Techniques Matter More Than the Freezer Itself
When you’re cooking freezer meals, you’re not cooking them the same way you’d cook a regular dinner.
With a regular meal, you cook it, plate it, and eat it. There’s very little thought about what happens after that. But freezer meals go through an entire journey before they end up on your plate again. They’re frozen, stored, thawed, reheated, and sometimes packed up to be eaten hours later at work or after a long day.
Every step in that process changes the food.
That’s why cooking techniques matter so much. You have to think about how flavors will hold up, how textures will change, and what reheating will do to the meal you’re making. Are my vegetables going to become mushy? Will the chicken dry out? Is the sauce going to separate? Will the pasta turn soft?
Great freezer meals don’t happen by accident. They require a little more attention to detail and a little more intention than everyday cooking. The question isn’t just, “How will this taste tonight?” It’s, “How will this taste after everything it has to go through before I finally sit down and eat it?”
These cooking techniques are the ones that I believe are the most essential when it comes to the basics.
Mise en Place
Mise en place is a French cooking term that translates to “everything in its place.” To me, it’s one of the most important techniques you can use when cooking any meal—especially freezer meals.
Think about your favorite restaurant. They’re able to produce high-quality food quickly and consistently because the work has already been done before the cooking even starts. Ingredients are chopped, measured, organized, and ready to go. When the chef steps onto the line, their focus isn’t on finding a knife or dicing an onion. It’s on executing the dish well.
The same concept applies at home.
Mise en place means doing the prep work first so that cooking becomes a matter of execution. Your vegetables are washed and cut, your proteins are portioned, your spices are measured, and everything is within reach before you turn on the stove.
This becomes even more important when you’re making freezer meals because you’re often cooking in batches. You might be browning a protein, blanching vegetables, and boiling a starch all at the same time. Having everything prepared beforehand allows you to move efficiently from one task to the next without feeling rushed or overwhelmed.
Instead of scrambling to chop vegetables while your pan gets too hot or your pasta overcooks, all that’s left to think about is timing and organization. The manual labor is already done. You can focus your attention on cooking each component properly, which ultimately leads to freezer meals that taste better when it’s finally time to reheat and enjoy them.
Seasoning Fundamentals
Seasoning is one of the most important cooking techniques you can learn, and when it comes to freezer meals, it’s often the difference between a meal that’s memorable and one that tastes bland after reheating.
At its core, seasoning is about bringing out the natural flavors of the ingredients you’re working with. Most of that comes from learning how to use salt, fat, acidity, and umami together to create balance.
One of the biggest mistakes people make is treating seasoning as a one-time event. They’ll add all of their spices and salt at the beginning of cooking and never revisit it again. In reality, seasoning is something you do progressively throughout the entire cooking process.
As you cook, you taste. You adjust. Maybe a little salt enhances the flavors you already have, but the dish still tastes flat. A squeeze of lemon juice or splash of vinegar adds acidity and suddenly everything comes alive. As sauces reduce and ingredients continue to cook, you may find that the flavors have mellowed and need another small adjustment.
Seasoning in layers allows you to build flavor gradually while staying in control. If you add too much all at once, there’s no easy way to take it back.
This becomes even more important with freezer meals. Even when you do everything right, freezing and reheating introduce extra moisture into the dish. As food thaws and reheats, that moisture can dilute flavors and make a meal taste less vibrant than it did on the day you cooked it. That’s why I tend to season freezer meals generously rather than timidly. You want the flavors to survive the entire journey from your kitchen to the moment you sit down to eat.
Salt
Salt is often misunderstood. Its job isn’t simply to make food taste salty. Used properly, it amplifies and enhances the natural flavors that are already there.
Fat
Fat provides richness and texture. It carries flavor, coats your palate, and gives food that satisfying, complete feeling. Think about stirring a little butter into a sauce at the very end of cooking. It creates a glossy finish and adds a richness that makes the dish feel finished.
Acid
Acidity brings balance. If a dish tastes too heavy or dull, a splash of lemon juice, vinegar, or another acidic ingredient can brighten everything and make the flavors pop.
Umami
Finally, I always think about umami. It’s that deep sense of satisfaction you get from a really good bite of food. Ingredients like ripe tomatoes, mushrooms, Parmesan cheese, cured meats, anchovies, seaweed, shrimp paste, and even MSG naturally provide it. When I’m cooking, I’m constantly adjusting and layering flavors until I reach that point where the dish feels complete and gives me that sense of, “Yes, that’s exactly what I was looking for.”
That’s the goal of seasoning. Not to make food salty or overpower it with spices, but to bring out the very best version of the meal you’re making.
The Maillard Reaction
The Maillard reaction is one of my favorite cooking techniques to use, and I think it’s one of the most valuable techniques you can apply to freezer meals.
At its core, the Maillard reaction is a chemical process that occurs between proteins and reducing sugars when they’re exposed to heat. While that might sound complicated, you’ve probably watched it happen countless times in your own kitchen.
Picture a steak searing in a hot pan. As it cooks, the outside begins to brown and develop a crust. That’s the Maillard reaction happening right before your eyes.
That browning does more than just make food look good. It develops flavor, creates texture, and helps produce a much more satisfying final product. There’s a noticeable difference between eating something that’s gone through this process and something that hasn’t.
Think about that seared steak compared to a steak that was cooked entirely using a sous vide method without being finished in a pan. The sous vide steak may be cooked through, but it lacks texture and depth of flavor. The steak may be perfectly tender, but without that final sear, it’s missing something. It doesn’t have the same crust, the same aroma, or the same satisfying bite.
The same principle applies to freezer meals.
As we’ve already discussed, freezing and reheating naturally dull flavors and soften textures. By taking the time to properly brown your proteins before they ever go into the freezer, you’re building in an extra layer of flavor and texture that helps survive the entire process. In many ways, you’re giving your meal a head start.
There are a few important things to remember if you want to get the most out of the Maillard reaction.
Maillard Reaction Tips
First, make sure your food is as dry as possible before it hits the pan. Excess moisture is the enemy of browning. Instead of searing, wet food tends to steam. The outside never develops that crust, while the inside continues to cook.
Second, avoid overcrowding the pan. Packing too much food into the pan at once lowers its temperature and traps moisture. Instead of browning, the food releases liquid and begins to steam. By the time that moisture evaporates, the food is often overcooked before it ever has a chance to develop color.
Give your ingredients space. Work in batches if you have to.
This technique alone can elevate almost any dish you make. Whether you’re browning ground beef for a pasta sauce, searing chicken for meal prep bowls, or developing a crust on meatballs before freezing them, the Maillard reaction is one of the simplest ways to build freezer meals that still taste incredible when it’s finally time to reheat and enjoy them.
Blanching to Preserve Texture
Blanching is one of the most essential techniques you can use when preparing vegetables for freezer meals. I find myself coming back to blanching time and time again because of how well it preserves texture, color, and overall quality after freezing and reheating.
The Blanching Process
The process itself is simple. Take a vegetable like broccoli and briefly cook it in boiling water. Personally, I don’t watch the clock as much as I watch the vegetable. As soon as I notice the color brighten and become more vibrant, I know it’s ready. From there, I immediately transfer it into an ice bath.
That quick plunge into ice water is just as important as the boiling step because it rapidly stops the cooking process. Instead of continuing to soften from residual heat, the vegetables hold onto their structure and avoid becoming overcooked before they ever make it into the freezer.
Once they’re cooled, you can season them, combine them with the rest of your meal components, and portion everything together in a proper container while maintaining better temperature control throughout the process.
One of the biggest benefits of blanching is that it slows the natural enzyme activity that causes vegetables to lose their color, flavor, and quality over time. In a way, that brief cooking process presses pause on the aging process. It gives you a better starting point before freezing, allowing your vegetables to retain more of the characteristics that made them appealing in the first place.
Is blanching an extra step? Absolutely.
But it’s one of those small investments of time that pays you back weeks later when you reheat your meal and the vegetables still have some texture, vibrant color, and freshness instead of turning soft and lifeless.
For freezer meals, that’s a trade-off I’m happy to make every time.
Aromatic Bases: Mirepoix and More
Aromatic bases are one of those cooking techniques that completely change the way you think about flavor. To me, they teach you to build flavor in layers instead of trying to fix a dish at the very end.
Cultural Impacts
The French have mirepoix. Latin American cuisine has sofrito. Cajun and Creole cooking have the holy trinity. Different regions around the world have their own variations, but the concept is global for a reason: it works.
These combinations of vegetables and aromatics create depth, release natural oils and aromas, and form the foundation that many great dishes are built upon.
Mirepoix, for example, traditionally consists of onion, carrot, and celery diced into similar-sized pieces. They’re cooked slowly in a fat, allowing them to soften and sweat before other ingredients are added. That simple step lays the groundwork for soups, sauces, braises, and stews by creating a flavor base that carries through the entire dish.
You can see the same idea in countless cuisines. Think about jambalaya, where the holy trinity of onion, celery, and bell pepper is often paired with a dark roux to build layers of flavor from the very beginning. The finished dish tastes complex and satisfying because its foundation was built intentionally.
This concept becomes especially important in freezer meals.
Freezer meals go through a long journey. They’re cooked, frozen, stored, thawed, reheated, and eventually eaten days or even weeks later. Along the way, it’s easy for flavors to soften and lose some of their intensity, even when you’ve seasoned generously.
Starting with a strong aromatic base gives your meal an advantage. By developing flavor gradually and layering it throughout the cooking process, you create dishes with the depth and character needed to survive everything that comes after.
In my opinion, this is one of the biggest differences between a freezer meal that’s simply convenient and one that’s genuinely memorable. Anyone can add more seasoning at the end. Building flavor from the start is what makes a meal stand out.
Thickening Methods: Reductions and Rouxs
I get excited about thickening methods because, if I’m being completely honest, sauce is one of my favorite parts of a meal.
When you’re creating sauces for freezer meals, you have to think about more than just flavor. You have to think about water content, texture, and how that sauce is actually being held together. The way a sauce is built determines whether it reheats beautifully or falls apart completely.
Some sauces simply aren’t designed to survive the freezer.
Take a béarnaise sauce, for example. It’s held together through an emulsion of eggs, fat, and acid. Freeze it, thaw it, and reheat it, and there’s a good chance it’s going to separate and break. On the other hand, something like an enchilada sauce made with a roux tends to hold together extremely well. It reheats beautifully, maintains its texture, and still tastes great.
That’s why thickening methods matter so much.
When I think about freezer meals, I usually rely on two main approaches: reductions and rouxs.
Reductions
A reduction is exactly what it sounds like. You’re taking a sauce and slowly cooking off some of its water content. Think about making a glaze. As the liquid reduces, the flavors become more concentrated and intense.
This works incredibly well for freezer meals because you’re removing excess moisture while preserving all of the flavor. The finished sauce feels richer and more flavorful without turning your meal watery after reheating.
Roux
A roux takes a different approach. By cooking fat and flour together, you’re creating a thickening agent that gives sauces structure and stability. This makes roux-based sauces especially freezer-friendly because they tend to withstand freezing and reheating without separating.
Neither method is necessarily better than the other. They’re simply different tools for different jobs.
The bigger lesson is understanding that water is often the enemy of a great freezer meal. Sauces, gravies, stews, cream-based dishes, and fillings all release moisture throughout the freezing and reheating process. If they start out too thin, they’ll often end up even thinner by the time you eat them.
Taking the time to properly reduce or thicken your sauces before freezing can make the difference between a meal that tastes homemade and one that feels disappointing.
In my opinion, this is one of those techniques that elevates everything. When the sauce reheats just as beautifully as the rest of the meal, it brings the entire dish together and turns convenience into something that still feels comforting and intentional.
Temperature Control
Temperature control is one of the most important techniques in freezer cooking because you’re constantly managing temperatures far beyond the cooking process itself.
It starts before you even begin cooking.
Whenever possible, you want to avoid taking food directly from the freezer and throwing it straight into a pan or oven. Allowing ingredients to thaw properly gives you much more control over the cooking process and helps everything cook more evenly.
You also want to make sure your equipment is ready before your ingredients ever hit it. Preheating your pans and ovens allows you to achieve the results you’re looking for. Whether you’re trying to develop a Maillard reaction, roast vegetables properly, or cook proteins evenly, temperature matters. If your cooking surface isn’t hot enough, you won’t get the flavor and texture you’re after.
Temperature control continues even after the cooking is finished.
Control After the Cook
One of the biggest mistakes people make with freezer meals is rushing food straight into containers and placing it directly into the freezer. While it might seem like a time-saver, hot food trapped inside a sealed container releases steam. That steam turns into condensation, condensation freezes into ice crystals, and eventually those ice crystals melt back into excess water when the meal is reheated.
The result is often pooled liquid, diluted flavors, and freezer burn that leads to a disappointing meal.
It’s also important to remember that food doesn’t stop cooking the moment you remove it from heat. Residual heat continues to affect texture and doneness even after a pan leaves the burner.
Blanching is a perfect example of this principle. Vegetables are briefly cooked in boiling water and then immediately transferred into an ice bath to stop the cooking process. That intentional use of temperature preserves texture, prevents overcooking, and prepares the vegetables to be seasoned, frozen, and reheated successfully later on.
In many ways, temperature control is about respecting every stage of the journey. It’s understanding that great freezer meals aren’t made in a single moment. They’re built through dozens of small decisions that protect flavor, texture, and quality from the first step of cooking all the way to the moment you sit down to eat.
Want the complete freezer meal system? Get the free blueprint.
Think Like a Freezer Cook
Making freezer meals comes with a lot of obvious benefits. They save you money, help you stay on track with your health goals, and give you back valuable time when life gets busy.
But all of that effort can go to waste if you aren’t using the right cooking techniques along the way.
The freezer meal process itself can be lengthy, and it’s not particularly gentle on food. Meals are cooked, cooled, frozen, stored, thawed, reheated, and eventually eaten days or even weeks later. Every stage has the potential to affect flavor, texture, and quality.
The good news is that you can stay one step ahead of those challenges.
By applying the right techniques, you’ll season with intention, build flavor in layers, control moisture, manage temperatures properly, and choose cooking methods that give your meals the best chance of success. You’ll protect the texture, flavor, and moisture that made the meal enjoyable in the first place.
And when you finally sit down to eat that meal after a long day at work or during a busy week, you’ll open that container and think:
“Wow, this tastes really good.”
It saved you time, helped you make a healthier choice, and reduced stress when you needed it most.
And you’ll be glad you took the time to do it the right way.
Because freezer meals shouldn’t feel like a compromise. With the right techniques, they can be every bit as satisfying as the day you made them.
Looking for the tools behind this system?
View Recommended Tools
About the Author
Here at Cook Once Eat Later we share freezer meal recipes, meal prep systems, and practical freezing guides designed to help busy people save time without sacrificing flavor. Our focus is helping meals retain their texture, moisture, and quality long after they’ve been frozen.
Follow Cook Once Eat Later on Instagram for freezer meal tips, recipes, and meal prep inspiration.
FAQ
What are the most important cooking techniques for freezer meals?
The most important cooking techniques for freezer meals include mise en place, seasoning in layers, using the Maillard reaction to build flavor, blanching vegetables, developing aromatic bases like mirepoix, properly thickening sauces, and controlling temperatures throughout the cooking and freezing process. Together, these techniques help preserve flavor, texture, and quality after reheating.
Why do freezer meals taste bland after reheating?
Freezing and reheating naturally dull flavors and introduce additional moisture into food. If meals aren’t seasoned properly or built with enough flavor from the beginning, they can taste flat after reheating. Seasoning in layers and using techniques like browning and aromatic bases help freezer meals retain their flavor.
Should you season freezer meals differently?
In many cases, yes. Because freezing and reheating can soften flavors, freezer meals often benefit from more intentional seasoning. Taste as you cook, adjust gradually, and don’t be afraid to season generously while maintaining balance.
Why is browning meat important before freezing?
Browning meat through the Maillard reaction develops flavor and creates texture that can withstand the freezing and reheating process. Properly seared proteins often taste much more satisfying than proteins that were simply cooked through without developing any color.
Do vegetables need to be blanched before freezing?
Not all vegetables require blanching, but many benefit from it. Blanching briefly cooks vegetables and then rapidly cools them in an ice bath, helping preserve their color, texture, and quality during freezing. Vegetables like broccoli, green beans, and carrots often freeze better when blanched first.
Why do freezer meal sauces become watery?
Sauces can become watery because freezing, thawing, and reheating release moisture into the dish. Reducing sauces or using thickening methods like rouxs can help maintain a better consistency and prevent separation.
Can you freeze cream sauces?
Some cream sauces freeze well, while others don’t. Sauces stabilized with rouxs tend to hold up better than delicate emulsified sauces made with ingredients like eggs. Choosing freezer-friendly thickening methods helps improve the final result.
Why do my freezer meals develop ice crystals?
Ice crystals often form when excess moisture becomes trapped in the container before freezing. Allowing food to cool properly before packaging and minimizing condensation can help reduce ice crystal formation.
Is it safe to freeze hot food?
It’s best to allow food to cool before sealing and freezing it. Trapping steam inside a container creates condensation, which can negatively affect texture and flavor. Cooling food properly also gives you more control over the freezing process.
Are freezer meals worth the extra effort?
Absolutely. Freezer meals can save time, reduce food waste, support health goals, and make busy weeks far less stressful. Taking the time to use the right cooking techniques means you don’t have to sacrifice flavor and quality for convenience.